Starting Seeds Indoors
It only takes a little patience.
Some vegetable plants take a long time to grow before producing. Tomatoes, Peppers, Eggplant, Broccoli,
and Cauliflower are examples. In Connecticut's shorter growing season, these seeds must be started indoors.
Other vegetable seeds can be started indoors for an early harvest, but can be direct seeded in the garden.
No seedling should be planted outside before the last frost date. In Connecticut, that is May 15.
Many people plant their seedlings around the Memorial Day holiday.
To figure out when to start seeds for certain vegetables, See the Seed Planting Guide Here.
However, I like to start early. In my personal experience, some seeds take almost two weeks to germinate
even under a grow light on a heating mat. Other seeds sprout right away, but take time to grow their first
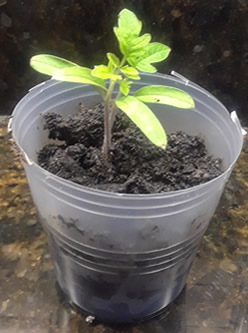
new leaves. You can always transplant your seedlings to a larger pot if they outgrow their first pot and it's
still too cool to go outside.
See the UCONN Tomato Seed Post
What do you need?
- Seeds
- plastic or paper cups
- seed starting mix
- tray to catch water
- watering can or large cup
1. Finding a grow container:
There are many fancy seedling systems that can be bought. But you can have just as much success with a plastic or paper cup.
A 6 ounce cup size is ideal. But if your cups are larger, just cut it down as in the picture. If you start with a cup that is too small,
you will have to move your seedling to a larger cup before it is ready to plant outside!
Lastly, punch holes in the bottom of the cup with a knife for drainage. Standing water in the cup will kill your seedlings.
2. Fill your cups with soil:
Any soil is acceptable. However, seedlings do best in a special seedling mix. These bags are sold next to the seed packets and are not expensive.
Seedling mix has vermiculite and other ingredients that hold moisture that seeds need to sprout.
If you are serious, FoxFarm seedling mix is best. There is fertilizer right in the mix.
3. Place your cups on a tray and water deeply:
The first time, deeply water the soil in each cup to make sure the soil is completely wet. Then, place each cup on a tray.
You need a tray to catch the water that drains from the bottom of your cups. No need to pour extra water off the tray. The water will
either evaporate or get wicked up by the soil in the cups when needed.
4. Plant your seeds:
Read the instructions on the back of your seed packet. Different vegetables need to be planted at different depths.
But generally, vegetable seeds are very forgiving if planted a little too deep. Use a pencil to poke a hole in the soil.
Then drop in a seed and lightly cover with soil.
You may want to plant two or three seeds in each cup as sprouting is not 100% guaranteed.
5. Cover your seeds:
The soil must be constantly moist for the seed to sprout. Keep the moisture in by covering your pots with a sheet of cellophane wrap.
6. Seeds need heat:
If you are serious and plan to start seeds every spring, invest in a heating mat. But if this is your first time
sprouting seeds, put your tray above a heat source. The top of your water heater is a great place to place your tray.
6. Sprouts need light:
Check your seeds every day, especially if they are in a dark cellar on the water heater. When most of them are sprouted, move your tray
to a light source. Serious gardeners have grow lights, but a sunny window will be okay for the beginner.
Other options are on a kitchen counter below an undercounter light.